
Getting started
Beginner Last updated Jul 12, 2026
On this page
Questwright compiles quests written as simple text files into playable MetaHuman dialogue scenes, with voice-over, lip-sync, staging, cameras, objectives and journal included. This guide takes you from a fresh install to a talking NPC.
Requirements
| Requirement | Value |
|---|---|
| Unreal Engine | 5.6 – 5.8 |
| Lip-sync baking | MetaHuman plugin + DX12 (optional; see below) |
| Characters | MetaHumans for the full facial showcase; any skeletal-mesh character otherwise |
| Voice-over | Optional: free local TTS server, ElevenLabs (your key), or your own WAV files |
| Project type | C++ or Blueprint-only |
Two things are worth understanding before you start:
- MetaHumans are optional. Dialogue, quests, staging, cameras, the journal and saving work with any skeletal-mesh character. The MetaHuman pipeline only powers baked lip-sync and the layered facial animation; without it the build degrades gracefully to a neutral face.
- Nothing is bundled, nothing phones home. Voice synthesis and machine translation use your own services and keys; with your own WAV files the plugin runs fully offline.
Install from Fab
- Open the Questwright product page on Fab and add it to your library.
- In the Epic Games Launcher, find it under Library → Fab Library and click Install to Engine.
- Open your project, go to Edit → Plugins, search for Questwright, tick Enabled and restart the editor.
For source builds or CI, enable it in the .uproject instead:
{
  "Plugins": [
    { "Name": "Questwright", "Enabled": true }
  ]
}
One-click project setup
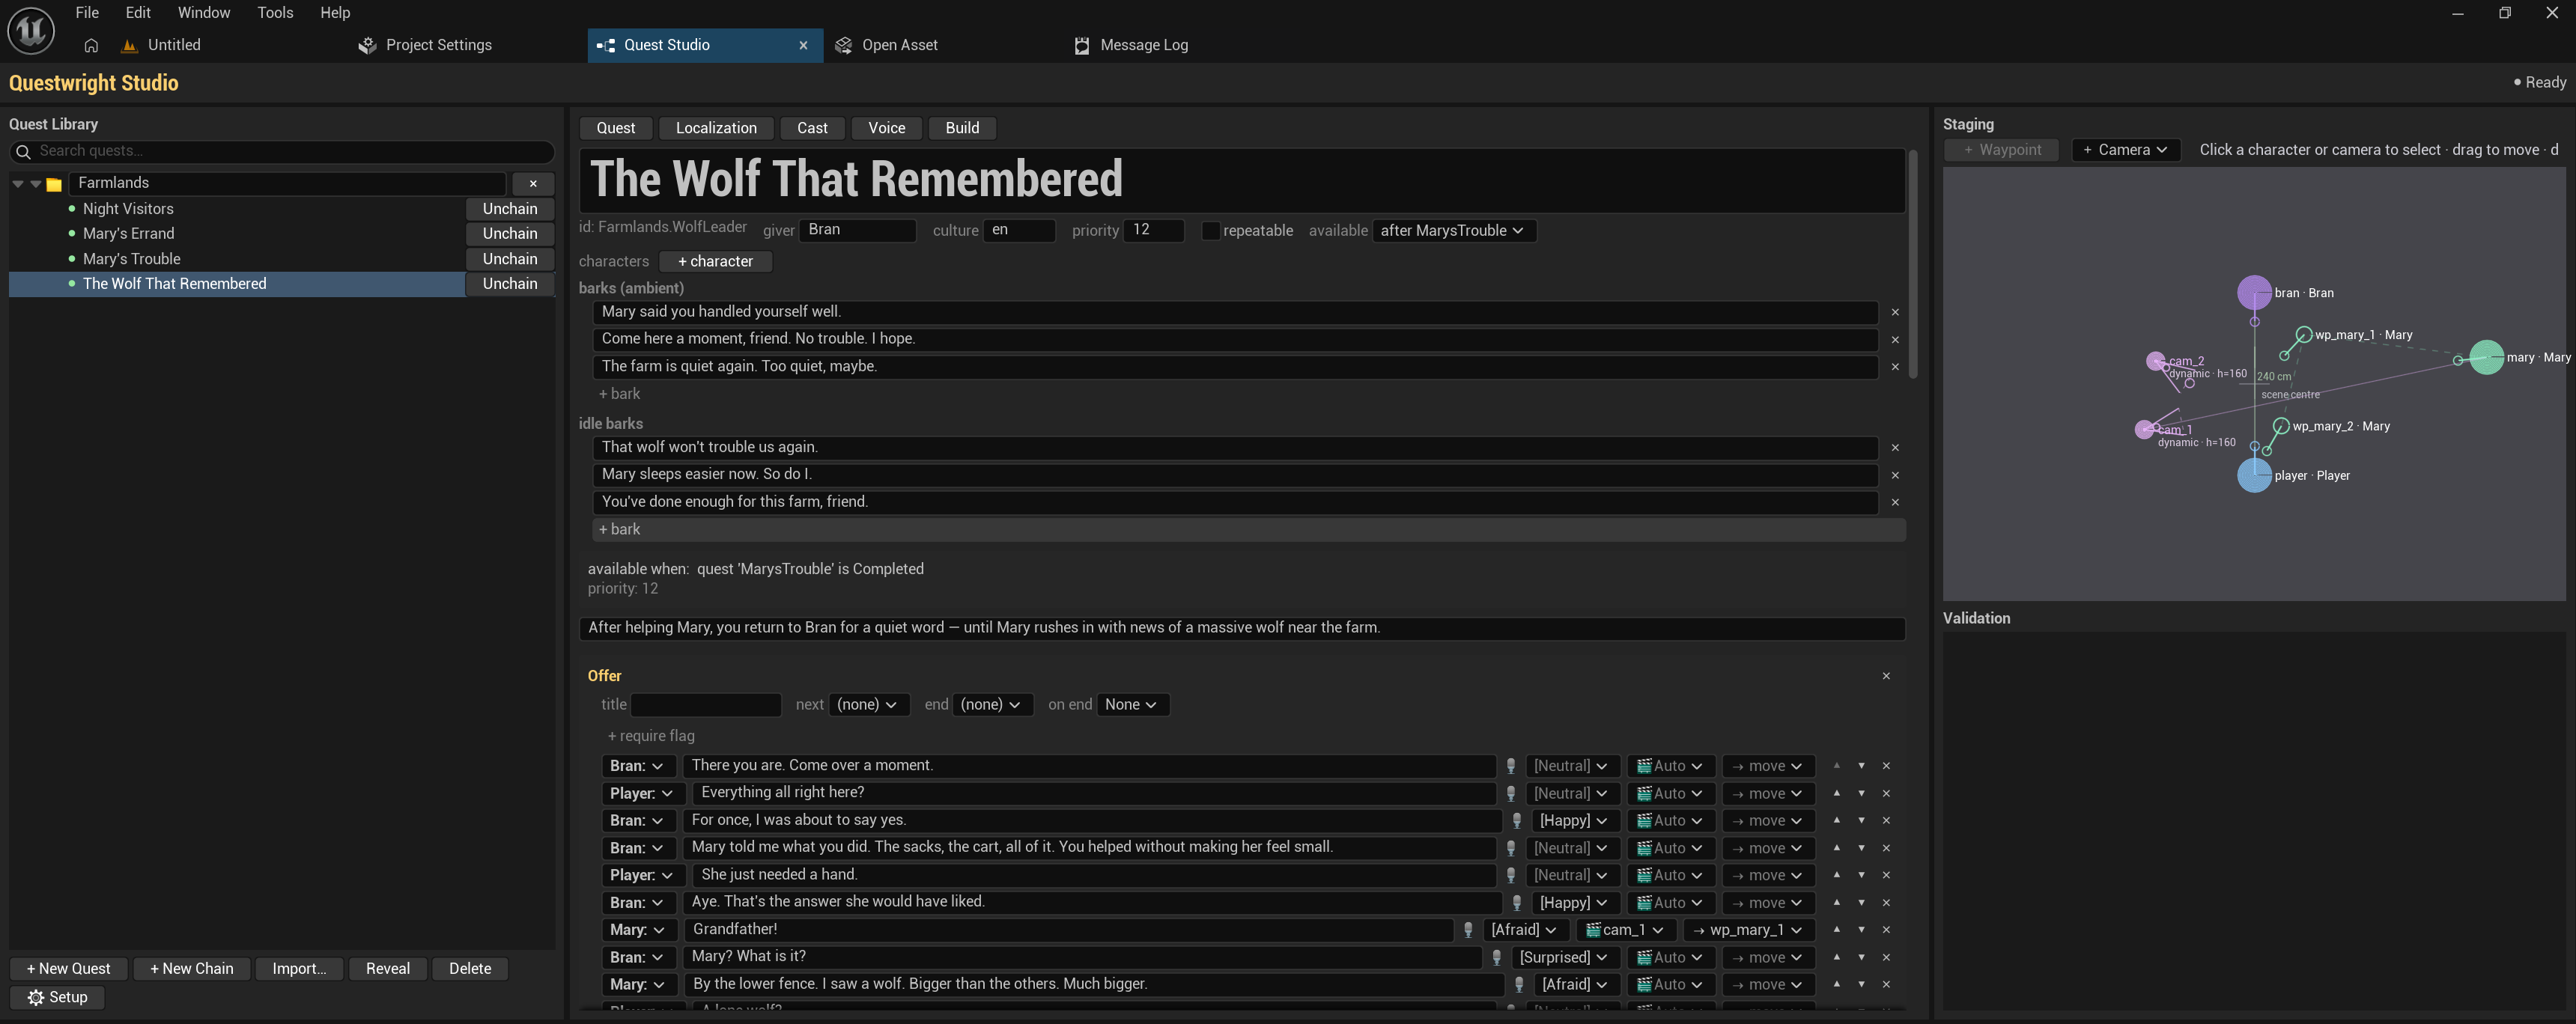
Open Tools → Quest Studio. The Studio is the single window that drives everything; the rest of the docs tour it in detail.
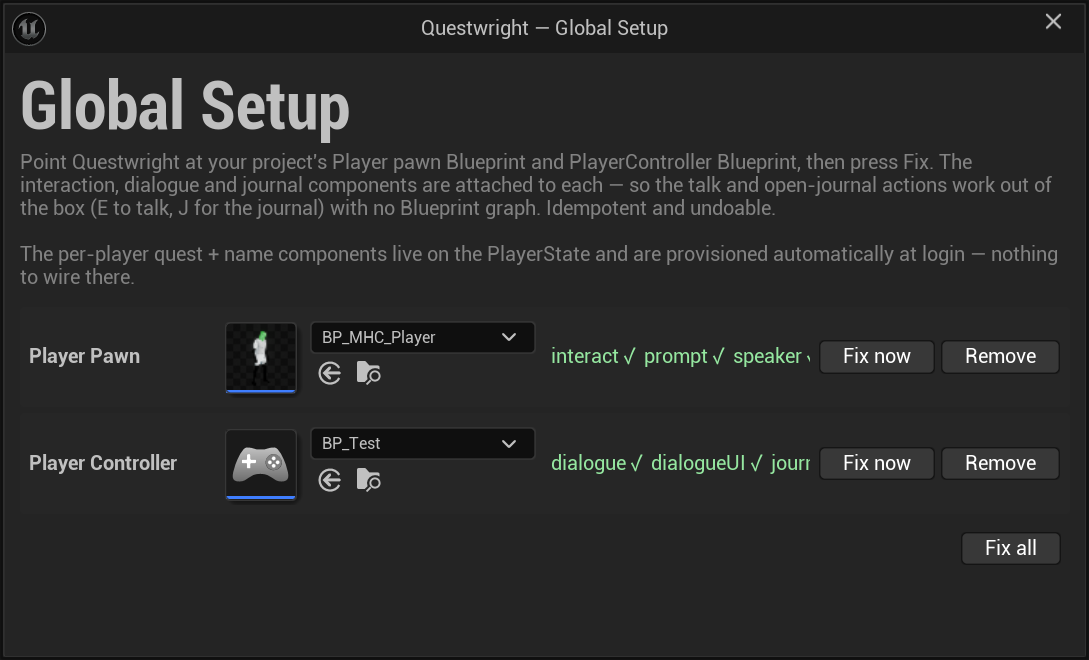
Click the Global Setup gear icon in the library bar. It wires your Player pawn and PlayerController Blueprints with the required Questwright components: interaction, dialogue client, quest HUD. One click, idempotent, reversible.
Cast your characters
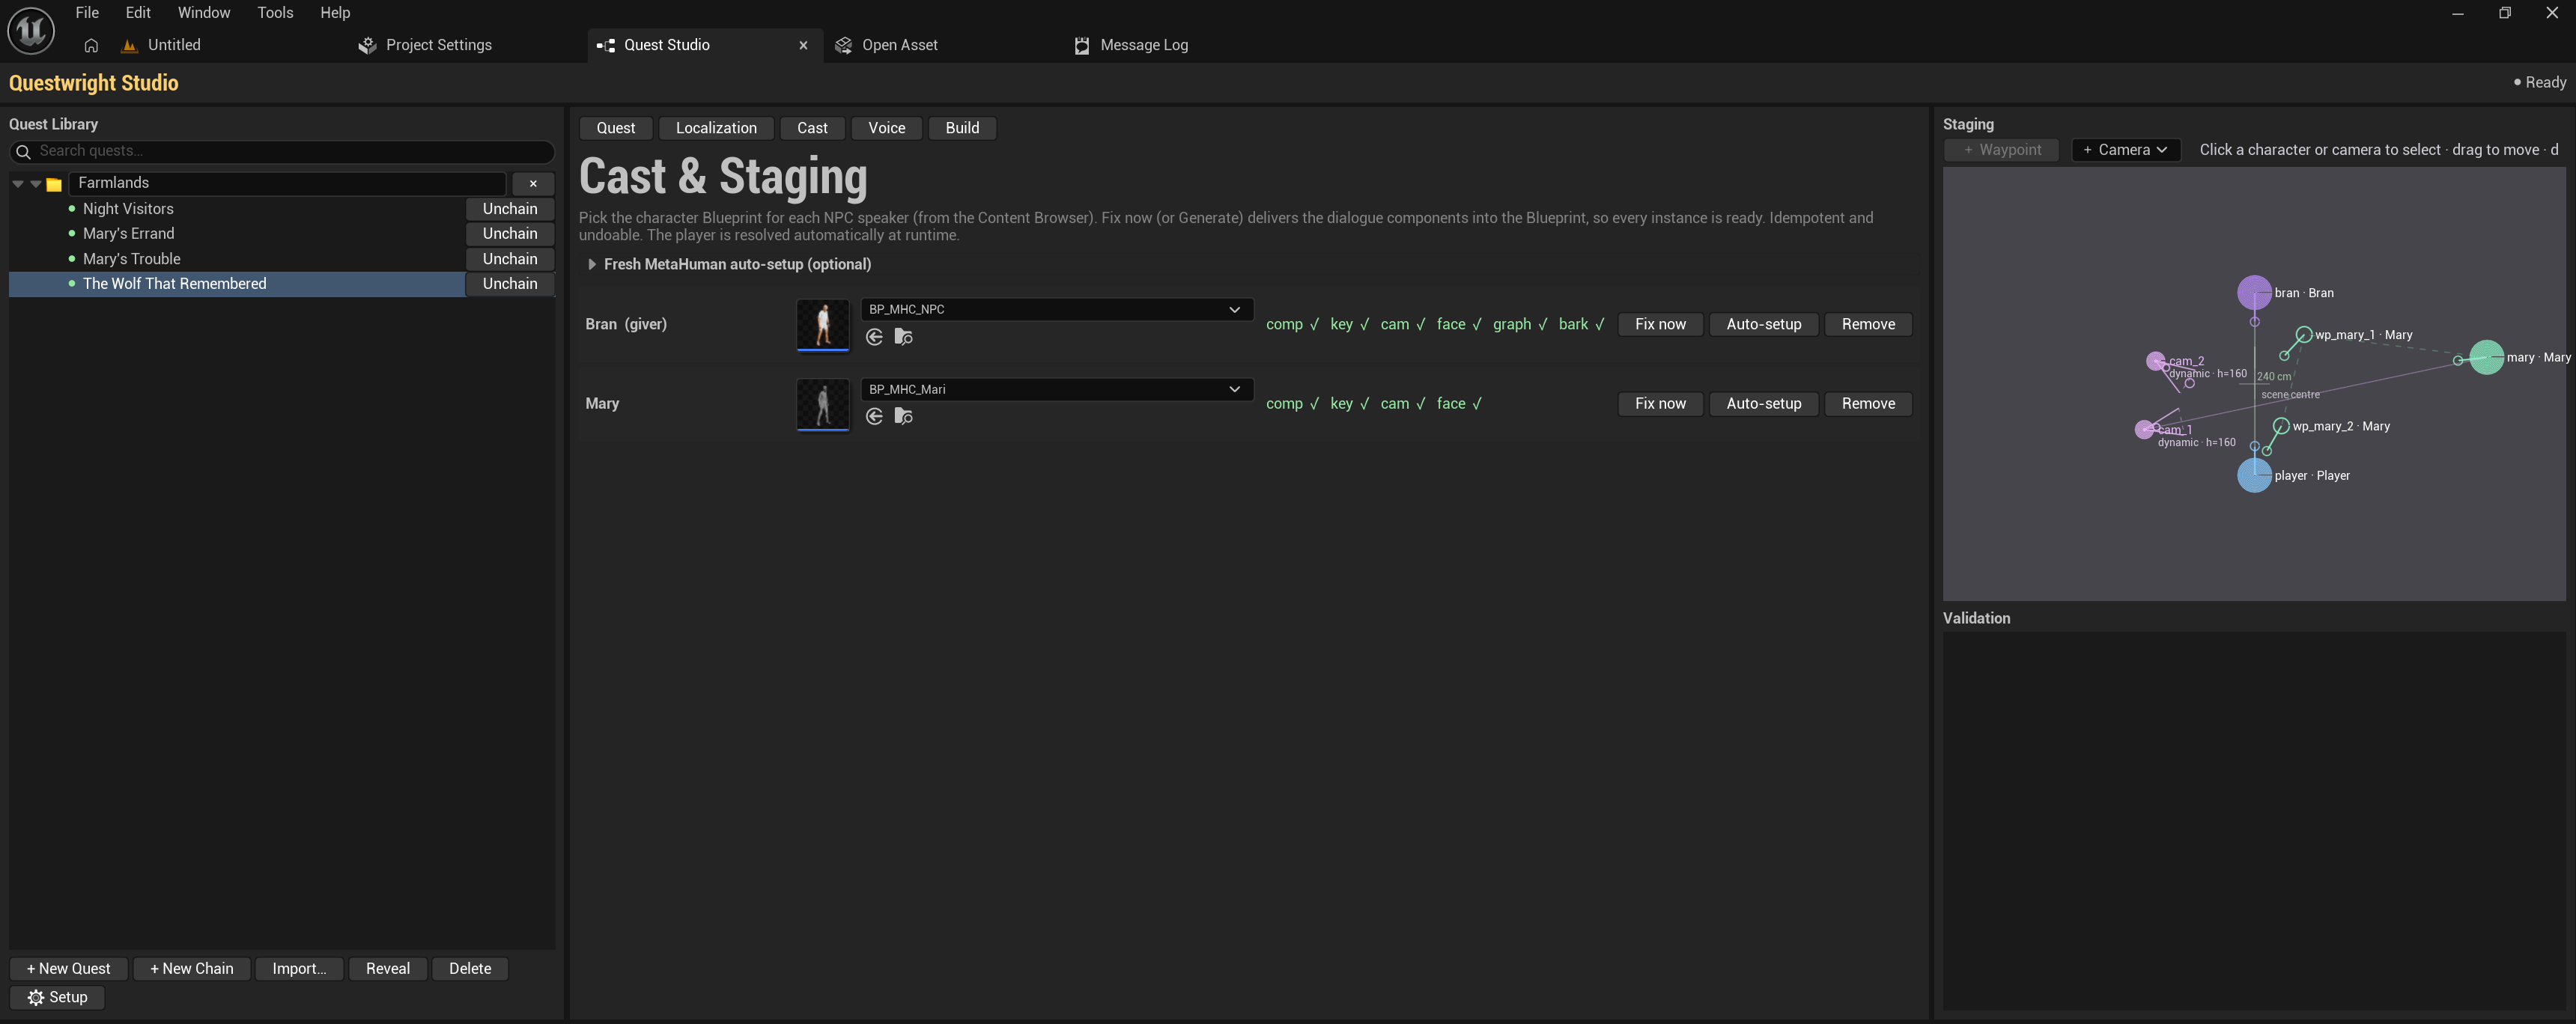
Open the Cast tab and pick a character Blueprint for each NPC speaker (drag one in or use the picker), then mark which entry is the Player. The health-check column shows what each character is missing; Fix now delivers the components immediately (the Build stage would also do it automatically).
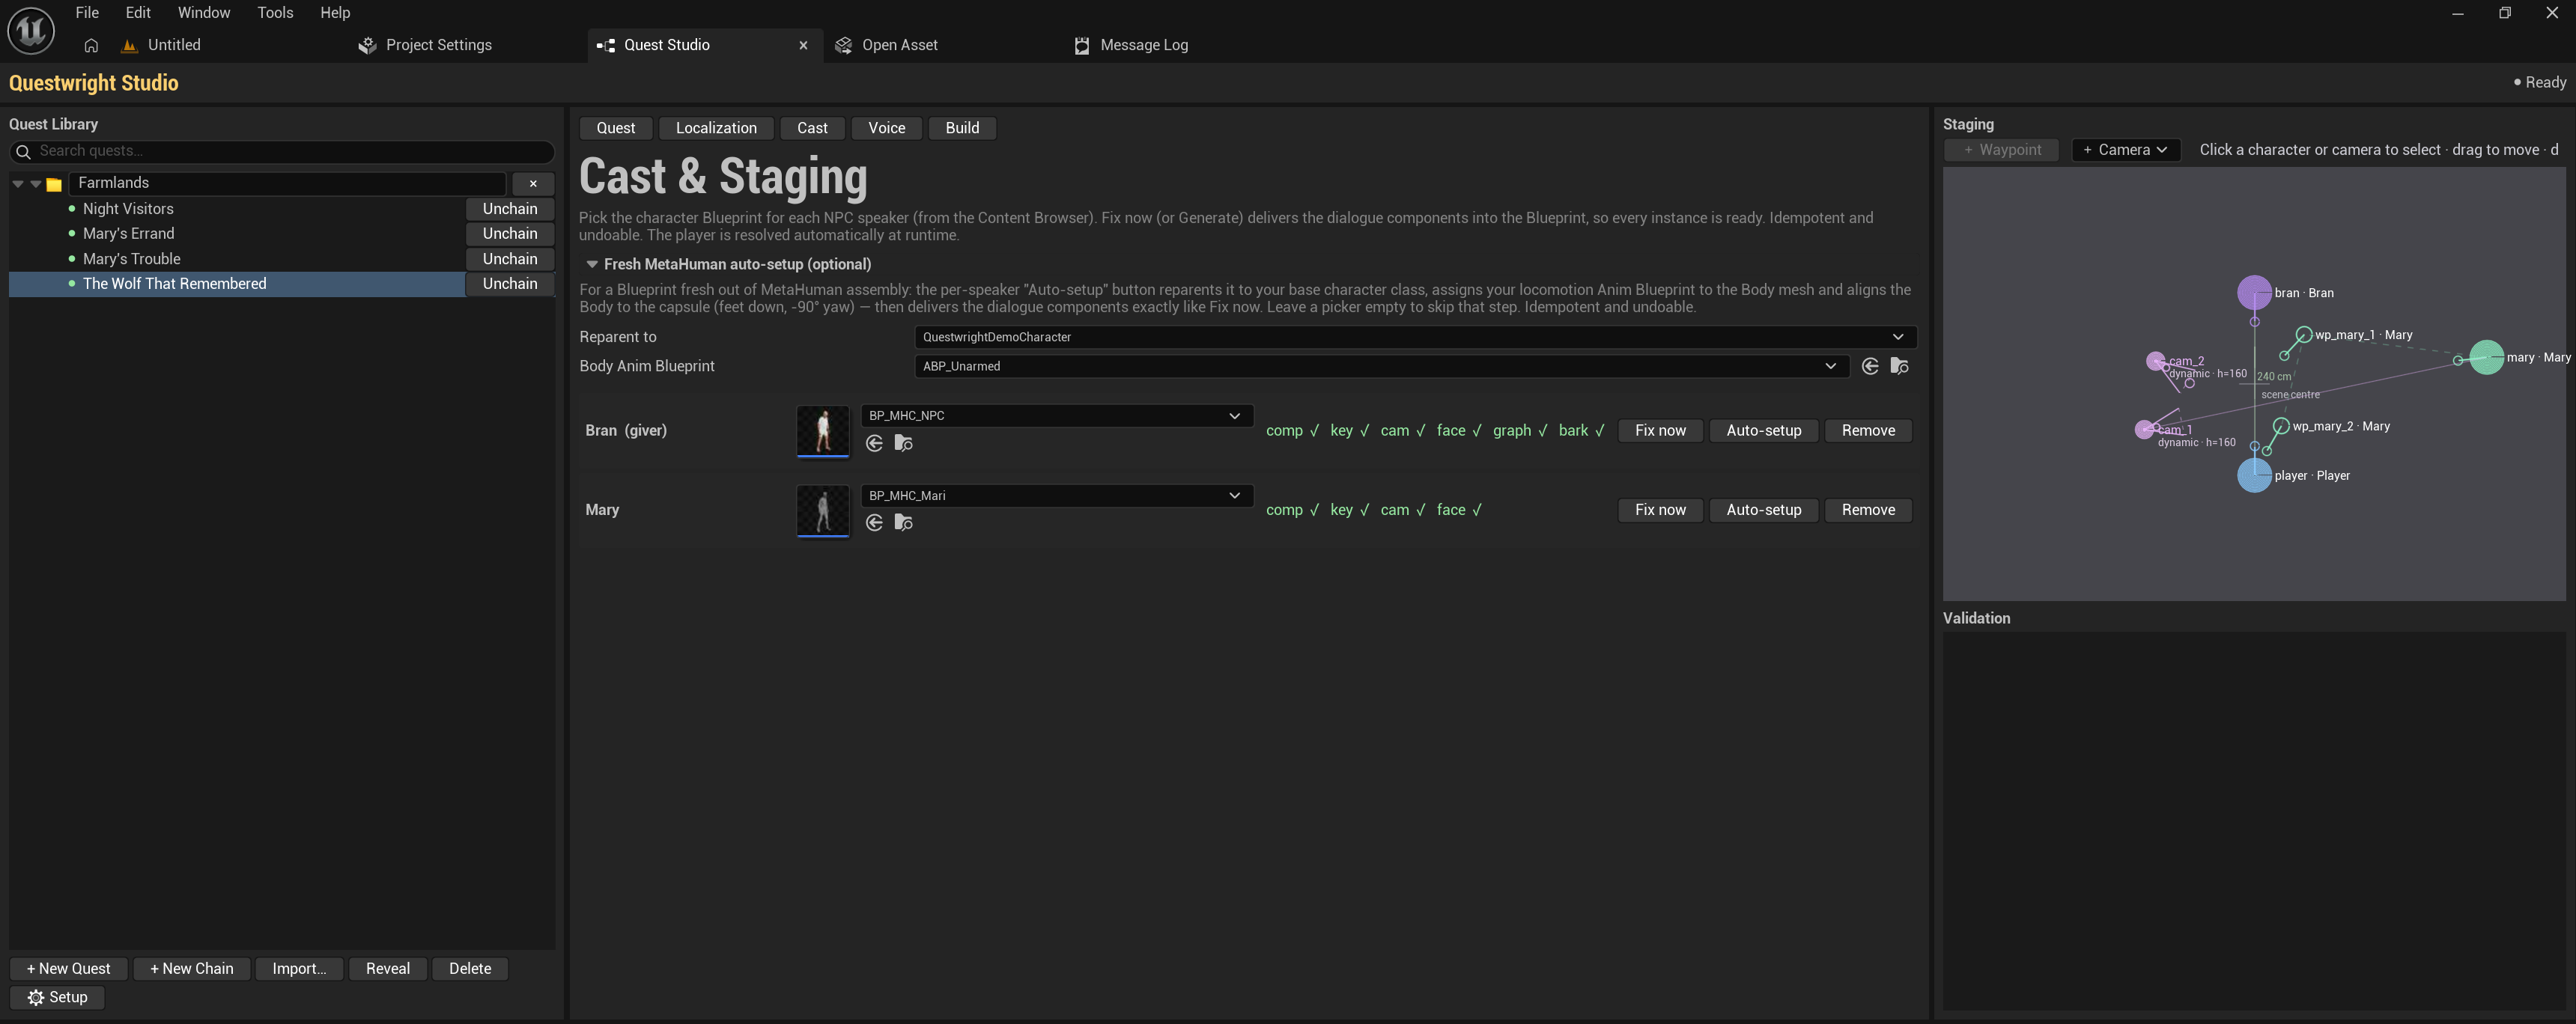
For a Blueprint fresh out of MetaHuman assembly there is an optional Fresh MetaHuman auto-setup section: pick your base character class and locomotion Animation Blueprint once, then the per-speaker Auto-setup button reparents the Blueprint, assigns the Anim Blueprint to the Body mesh, aligns the mesh to the capsule and delivers the dialogue components. The whole by-hand ritual, done in one click.
Build and play
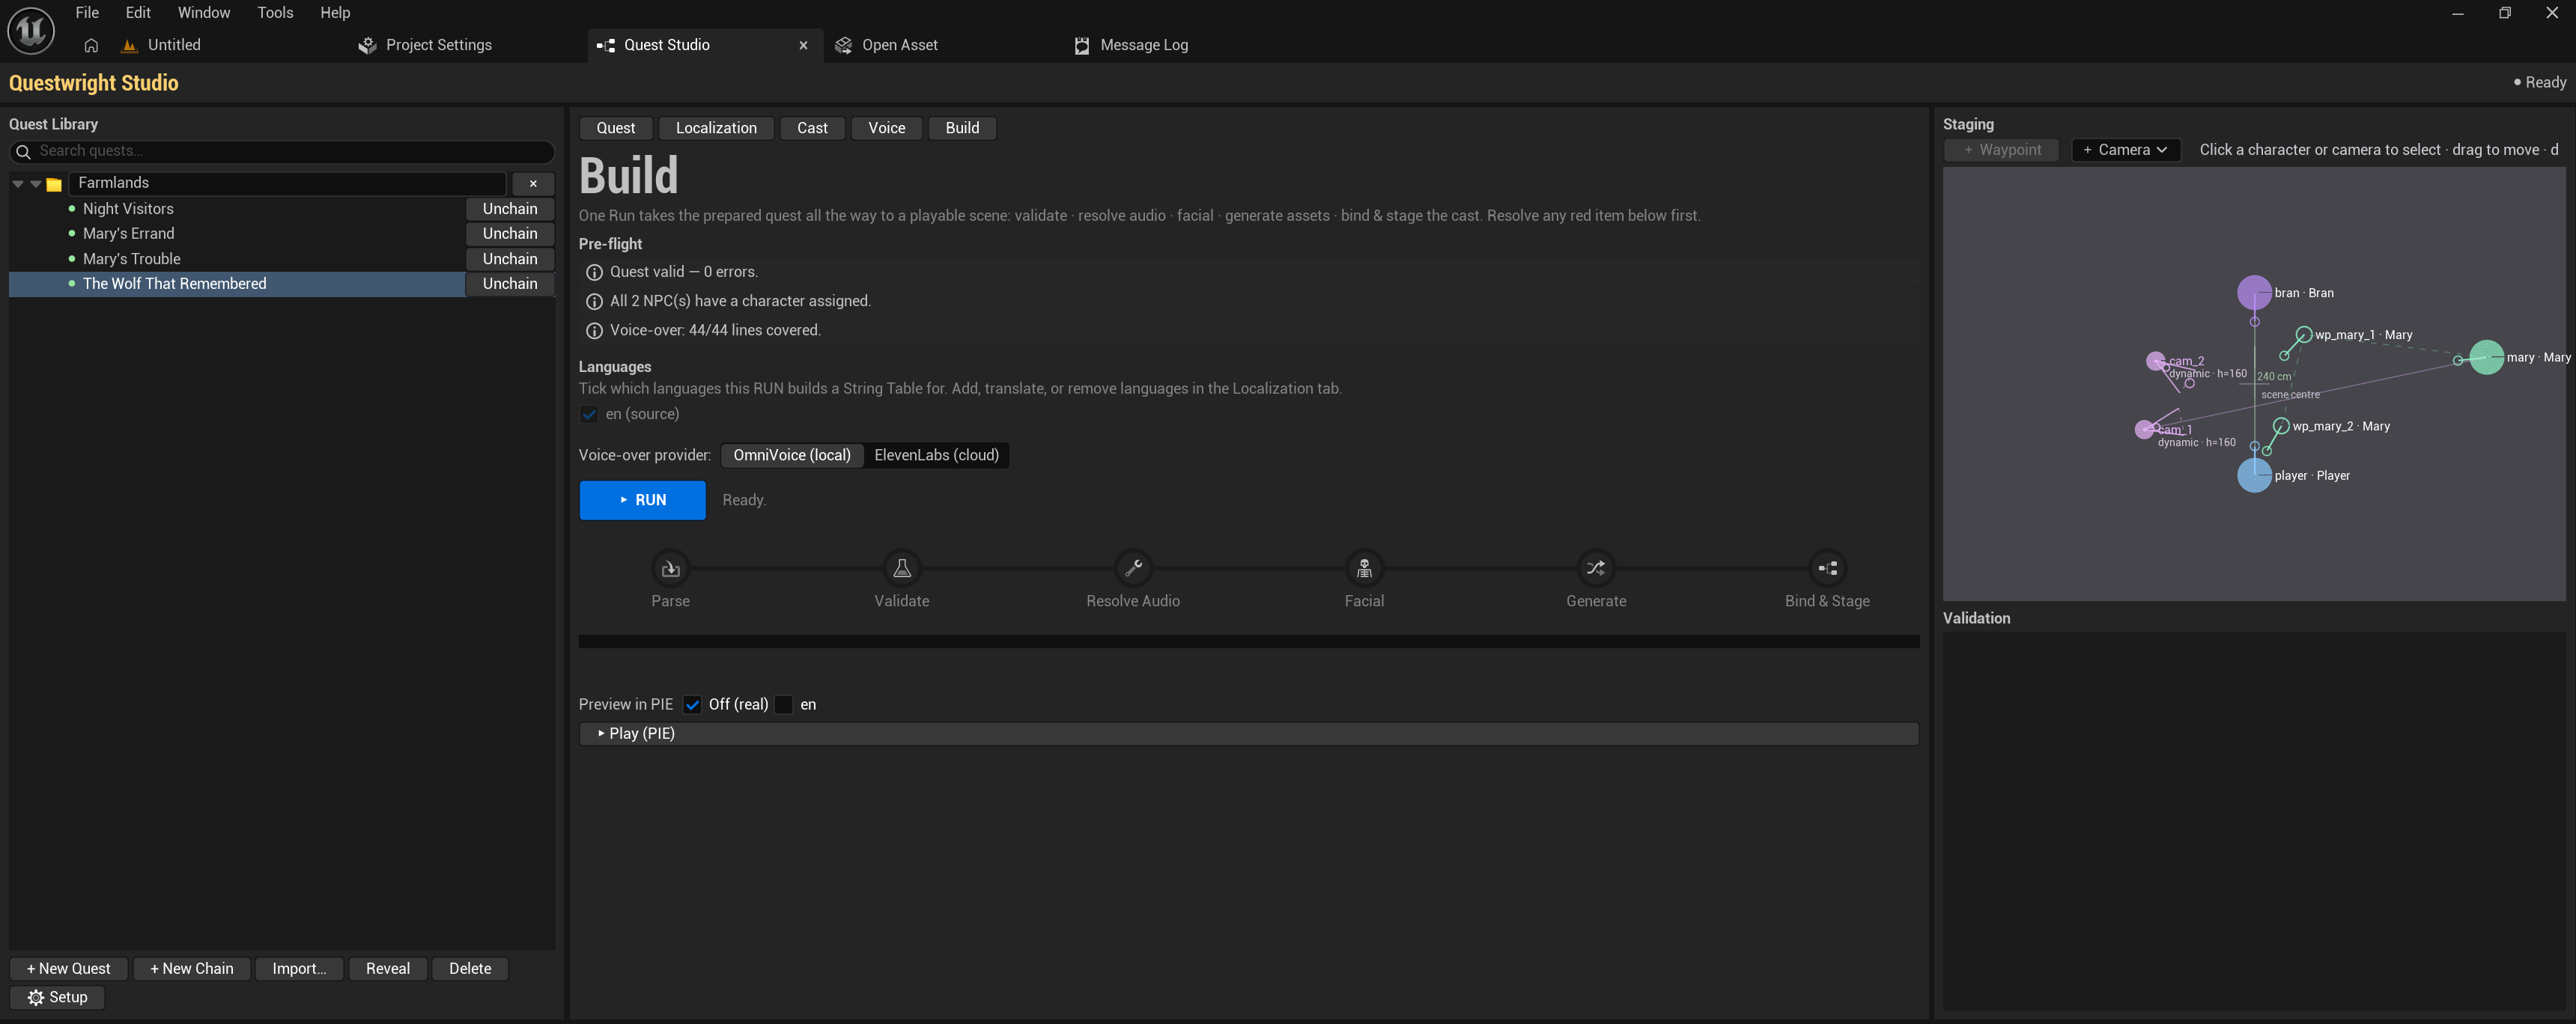
Open the Build tab and press RUN. The pipeline compiles the quest:
parse → validate → voice-over → facial animation → asset generation → bind & stageA live stage tracker shows progress; errors appear in the pre-flight checklist above the RUN button, each with a Fix → shortcut that jumps to the right tab.
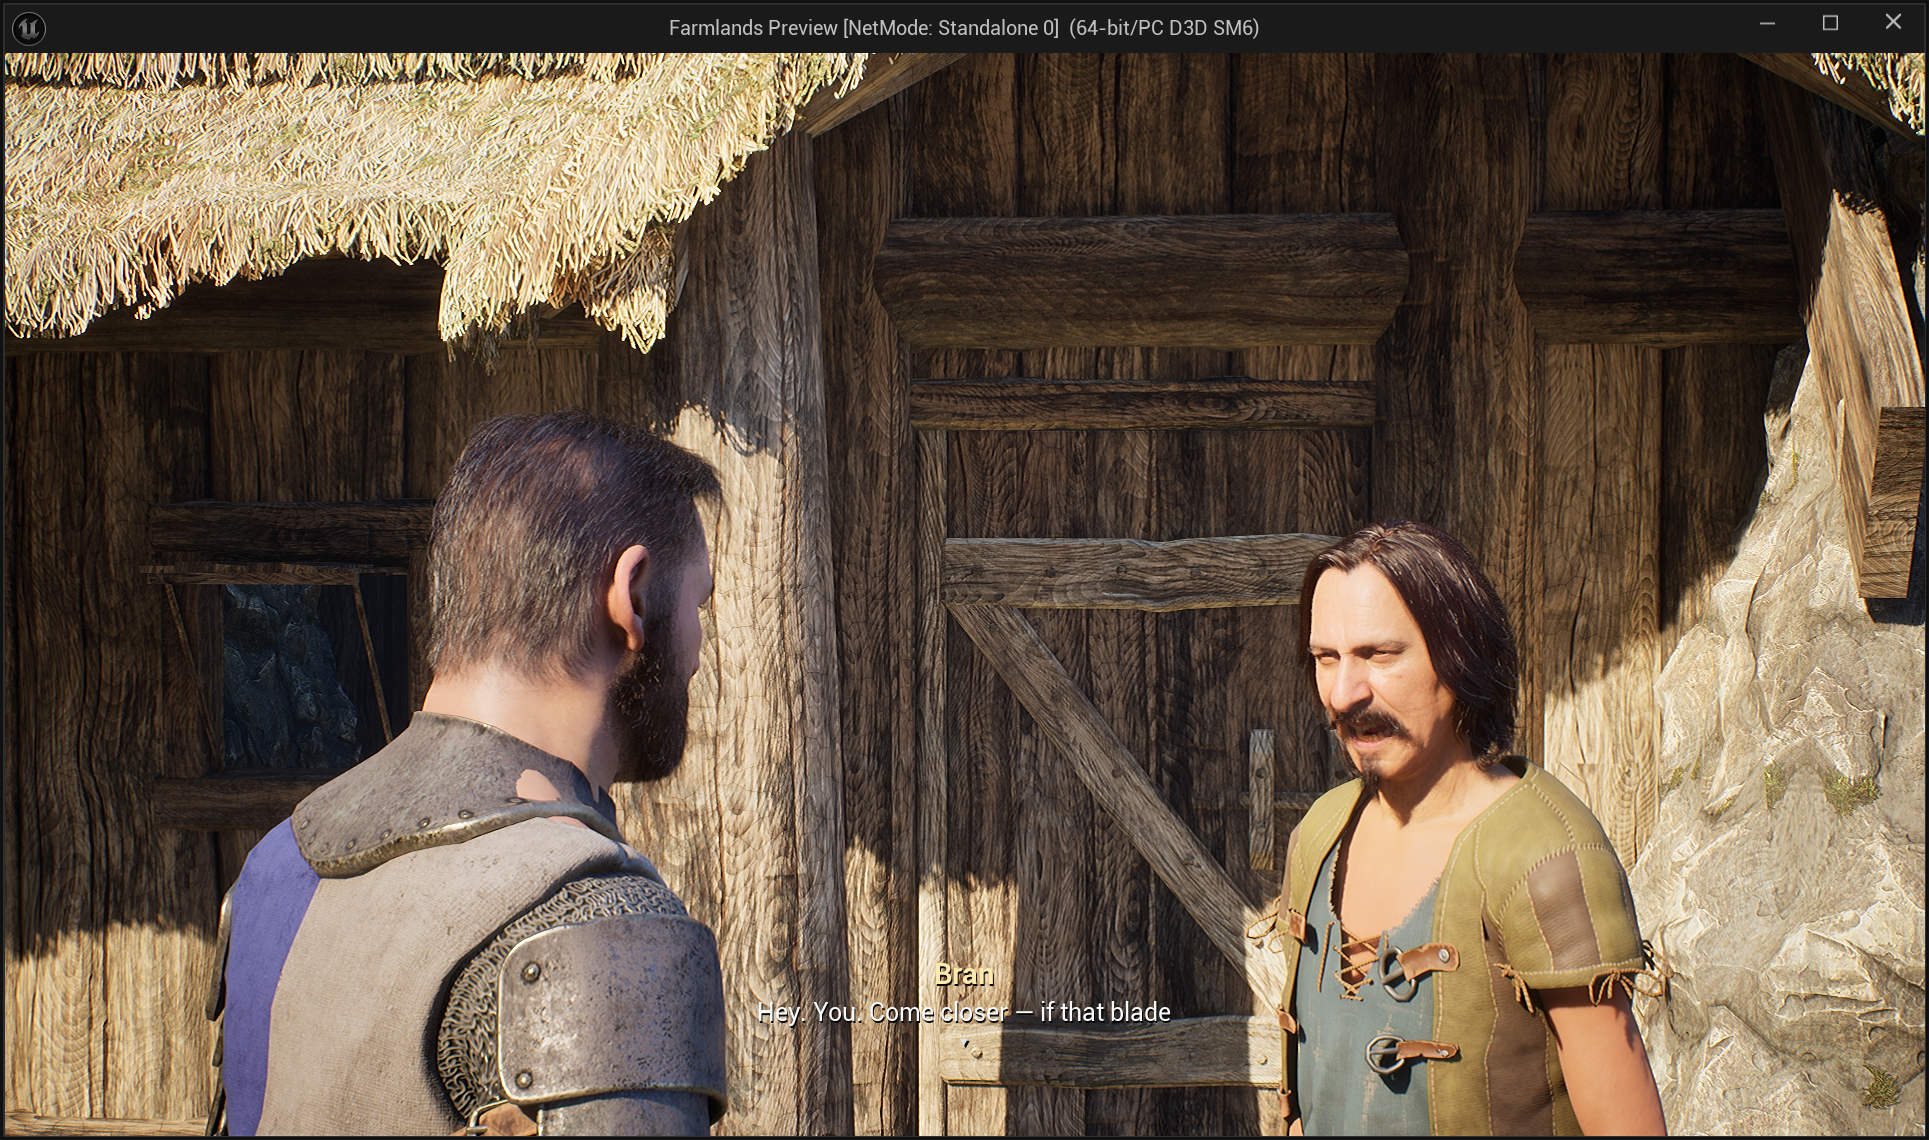
Press Play (PIE) and talk to the NPC.
All generated content is written into your project under /Game/Questwright/Generated/. The
plugin’s own content folder stays clean, and the shipped demo quest can be deleted without
breaking anything.
Where to go next
- The Quest Studio: a tour of every tab.
- Writing quests: the
.quest.yamlformat. - Settings reference: every project setting explained.
- Prefer reading offline? The complete documentation is downloadable as a single printable page or a Markdown bundle.